
Installation Guide
How to Fit Secondary Glazing
In just a couple of hours you could be feeling the benefits. Follow our How to Fit Guide or get in touch for any help and advice.
Download Our Installation Guide
Complete fitting instructions with step-by-step photography and diagrams.

PDF Guide
Comprehensive Installation Guide
The complete step-by-step fitting guide with photography. Print it off or take it to the window.
Download free PDFWatch Our Installation Guide Video
Fitting secondary glazing is simple and straightforward for anyone who tackles home DIY. Or you could ask a trusted tradesman to install for you. Whichever option you choose, most units can be fitted in a couple of hours, and no pre-preparation is needed on the primary window, and no touching up or re-decoration is required afterwards. Clearview kits arrive with simple, easy to follow fitting instructions, and customers report they found fitting simple and hassle free.
Wider trims and fixing kits are available to purchase to help with your installation.
For larger jobs, or if you live in our fitting area, our installation team can do the job for you.
Your Order Has Arrived
Here’s what you need to know and do next.
Your Clearview order has arrived, you’ve removed the packaging – here’s what you need to know and do next.
Note: the timber sub-frame is a value engineered section, it is designed to be trimmed over and hidden from view when installed. It may appear marked and show imperfections including cracks, splits, scratches and chips, this is perfectly normal and will not detract from the performance of the system. It is designed to be cut and adjusted onsite to achieve fit if required. Standard & XL sub-frames are supplied primed, bespoke cut timbers not all surfaces will be primed.
Expectations: When the units arrive, please inspect them to ensure they are correct for your application, if we do not hear back from you within a period of 10-days we will assume they have been accepted:
- The frame can be out-of-square as they are not a rigid structure until installed. The installation process will pull the unit back into square.
- Panel operating buttons may be tight as the units will have moved in transit, so manipulation of the panel to free up may be required.
- The units can be a little dusty or conveyor marked, with small amounts of swarf – they are direct from the factory and it is standard practice that they will require a clean down following the installation process. So to improve efficiency and cost, the units are cleaned to an expected level but based on the requirement of a final clean down on completion.
- Fixing materials are not included i.e. screws and packers.
Your primary window should need no preparation, but if it holds a telephone junction box, you will need to move it. In most cases, TV aerials and telephone cables can be accommodated, or left in place, and the frame can be notched to cater for these. Any cord ties can be attached back to the sub-frame after fitting.
Remember To
Use the pre-drilled fixing points
Use the pre-drilled fixing points to fit your unit. You can add more holes if required to avoid any obstacles or gain an extra firm hold if required.
Spacing for self-drill
If self-drilling the complete frame (e.g. reveal fix track drilling) we advise fixing holes be drilled at approx. 150mm–200mm from each end and then evenly spread at approx. 500mm intervals, adjusted as required to gain an even distribution / interval gap.
Use the self-drill support tool block if preferred
This is not essential, but will help keep the drill chuck from fouling on the aluminium.
Vertical Sliders: side sections cannot be drilled
When reveal fix track drilling on Vertical Sliders, the sides of the top section cannot be drilled due to the spring balance tubes. With the Standard & Glide versions, follow the general installation guidance for the remainder of the frame. For the Tilt-in version you will need to tilt out the bottom panel to get a fixing at each side just below the spring tube casing to the side of the spiral rod. Please refer to the installation guide.
Lift the unit into position and adjust
If necessary pack to ensure it is central, level and matches any primary window glazing bars, aided by the tolerance deduction. Pack around the unit as required to ensure the unit is level and centred.
Mark, drill and screw-fix the unit into place
Check the unit is level and in position. When fixed, the tolerance deduction leaves an approximate 5mm gap around the unit (depending on how straight your primary window frame is) which will be covered by the edging trims we supply with every order. These can be shaped to fit between wall and frame for a neat finish, and they are attached to the sub-frame with a 'no-nails' type adhesive or silicone.
Fixing Methods Explained
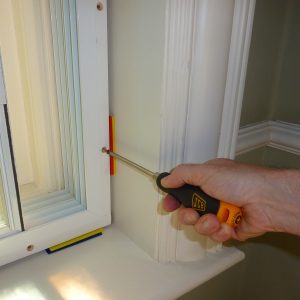 Face Fix front-to-back
Pre-drilled
The default option. The unit is placed in the reveal and screw fixed directly through the front of the sub-frame into the primary window frame or surrounding structure.
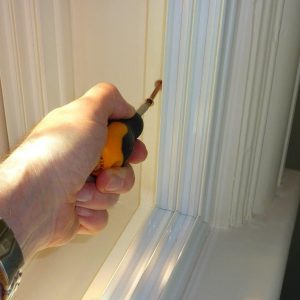 Reveal Fix side-to-side
Pre-drilled XL-Frame example
The unit is fixed through the sides into the reveal. Increases the air-gap between primary and secondary glass for improved soundproofing, or accommodates protruding handles.
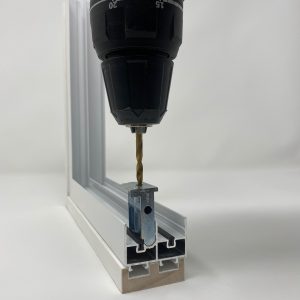 Reveal Fix: Track Self-Drill
DIY Self-Drill onsite
A cost-effective reveal-fix option where you drill fixing holes through the aluminium track on site using the supplied support tool block. Follow the spacing guidance in the installation guide.
Vertical Sliders: Reveal Fix Track Drilling
When onsite reveal fix track drilling, you cannot (do not) drill the top left/right side sections of the frame, this can cause damage to the spiral springs contained in the tubes. Drill where possible to the lower frame section. See the full Installation Guide.
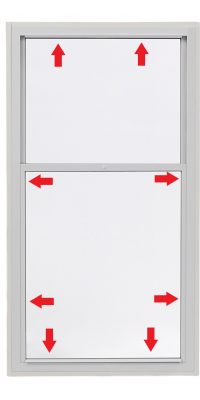 Drilling Points
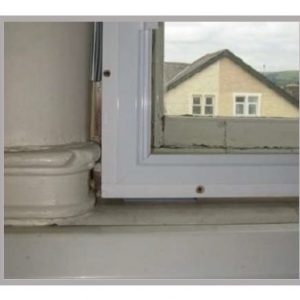 Fixed
Fixed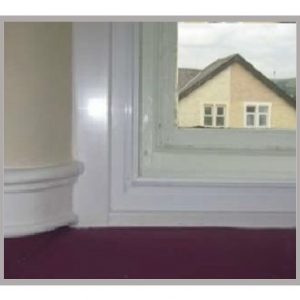 Trimmed & Complete
Note on standard fixing screw sizes
- We advise a minimum of 20mm screw fixing penetration depth. Longer screws may be required if fixing through a light/false panel wall area, until a secure key is found.
- For face fix (standard 43mm × 16 or 62 × 16mm sub-frame) 4mm × 70mm
- For reveal fix (track drilled or XL sub-frame) 4mm × 50mm
- We do not provide fixing screws or packers as standard as requirements differ from property to property, and the correct mix of materials cannot be catered for.
There’s no disruption when installing secondary glazing, and the work should be finished in a matter of hours, with no need to re-decorate. All Clearview products are covered by our 10 Year Guarantee, beginning from the date we supply your order. It guarantees that the product as supplied to you is free from defects in materials and workmanship for a period of 10 years for aluminium frames and glazing and 2 years for moving parts (including but not limited to springs, locks, handles, rollers, hinges). Our guarantee is a demonstration of our commitment to our customers and the quality of our product.
With minimum, regular maintenance, Clearview secondary glazing will deliver years of trouble-free operation.
Still unsure?
Arrange a call-back