
Measuring Guide
How to Measure
To measure your windows before ordering secondary glazing or getting a FastQuote, you just need a tape measure. Our measuring guide will help you get the most accurate measurements and best results. Our Size Guide shows the minimum and maximum sizes suggested for different window applications.
Download Our Measuring Guide
Step-by-step guidance with diagrams, templates and worked examples.
Measuring Guide Explainers
PDF Guide
Comprehensive Measuring Guide
The complete step-by-step measuring guide, covering all window types, bay windows, splayed reveals and more. Print it off and take it to your window.
Download free PDFHow To Measure Splayed Reveals and Bays
How To Measure Your Window For Hinge Units & Lift-Out Units
How To Measure Your Window For Horizontal & Vertical Sliders
Measuring Guide Templates
Print these off and take them directly to your window. They cover Tolerance Deductions, Panel Splits, Angled Reveals, Bay Windows and Arches.
- Guide to Tolerance Deductions »
- Measuring a Standard Window Template »
- Measuring a Panel Split Window Template »
- Measuring a Splayed Reveal Template »
- Build a Bay Guide »
- Measuring an Angled Bay Template »
- Measuring a Square Bay Template »
- Measuring a Multi-Unit Angled or Square Bay »
- Measuring a Curved Bay Template »
- Measuring a True Arch Template »
Fixing Options & Measuring: general interpretations
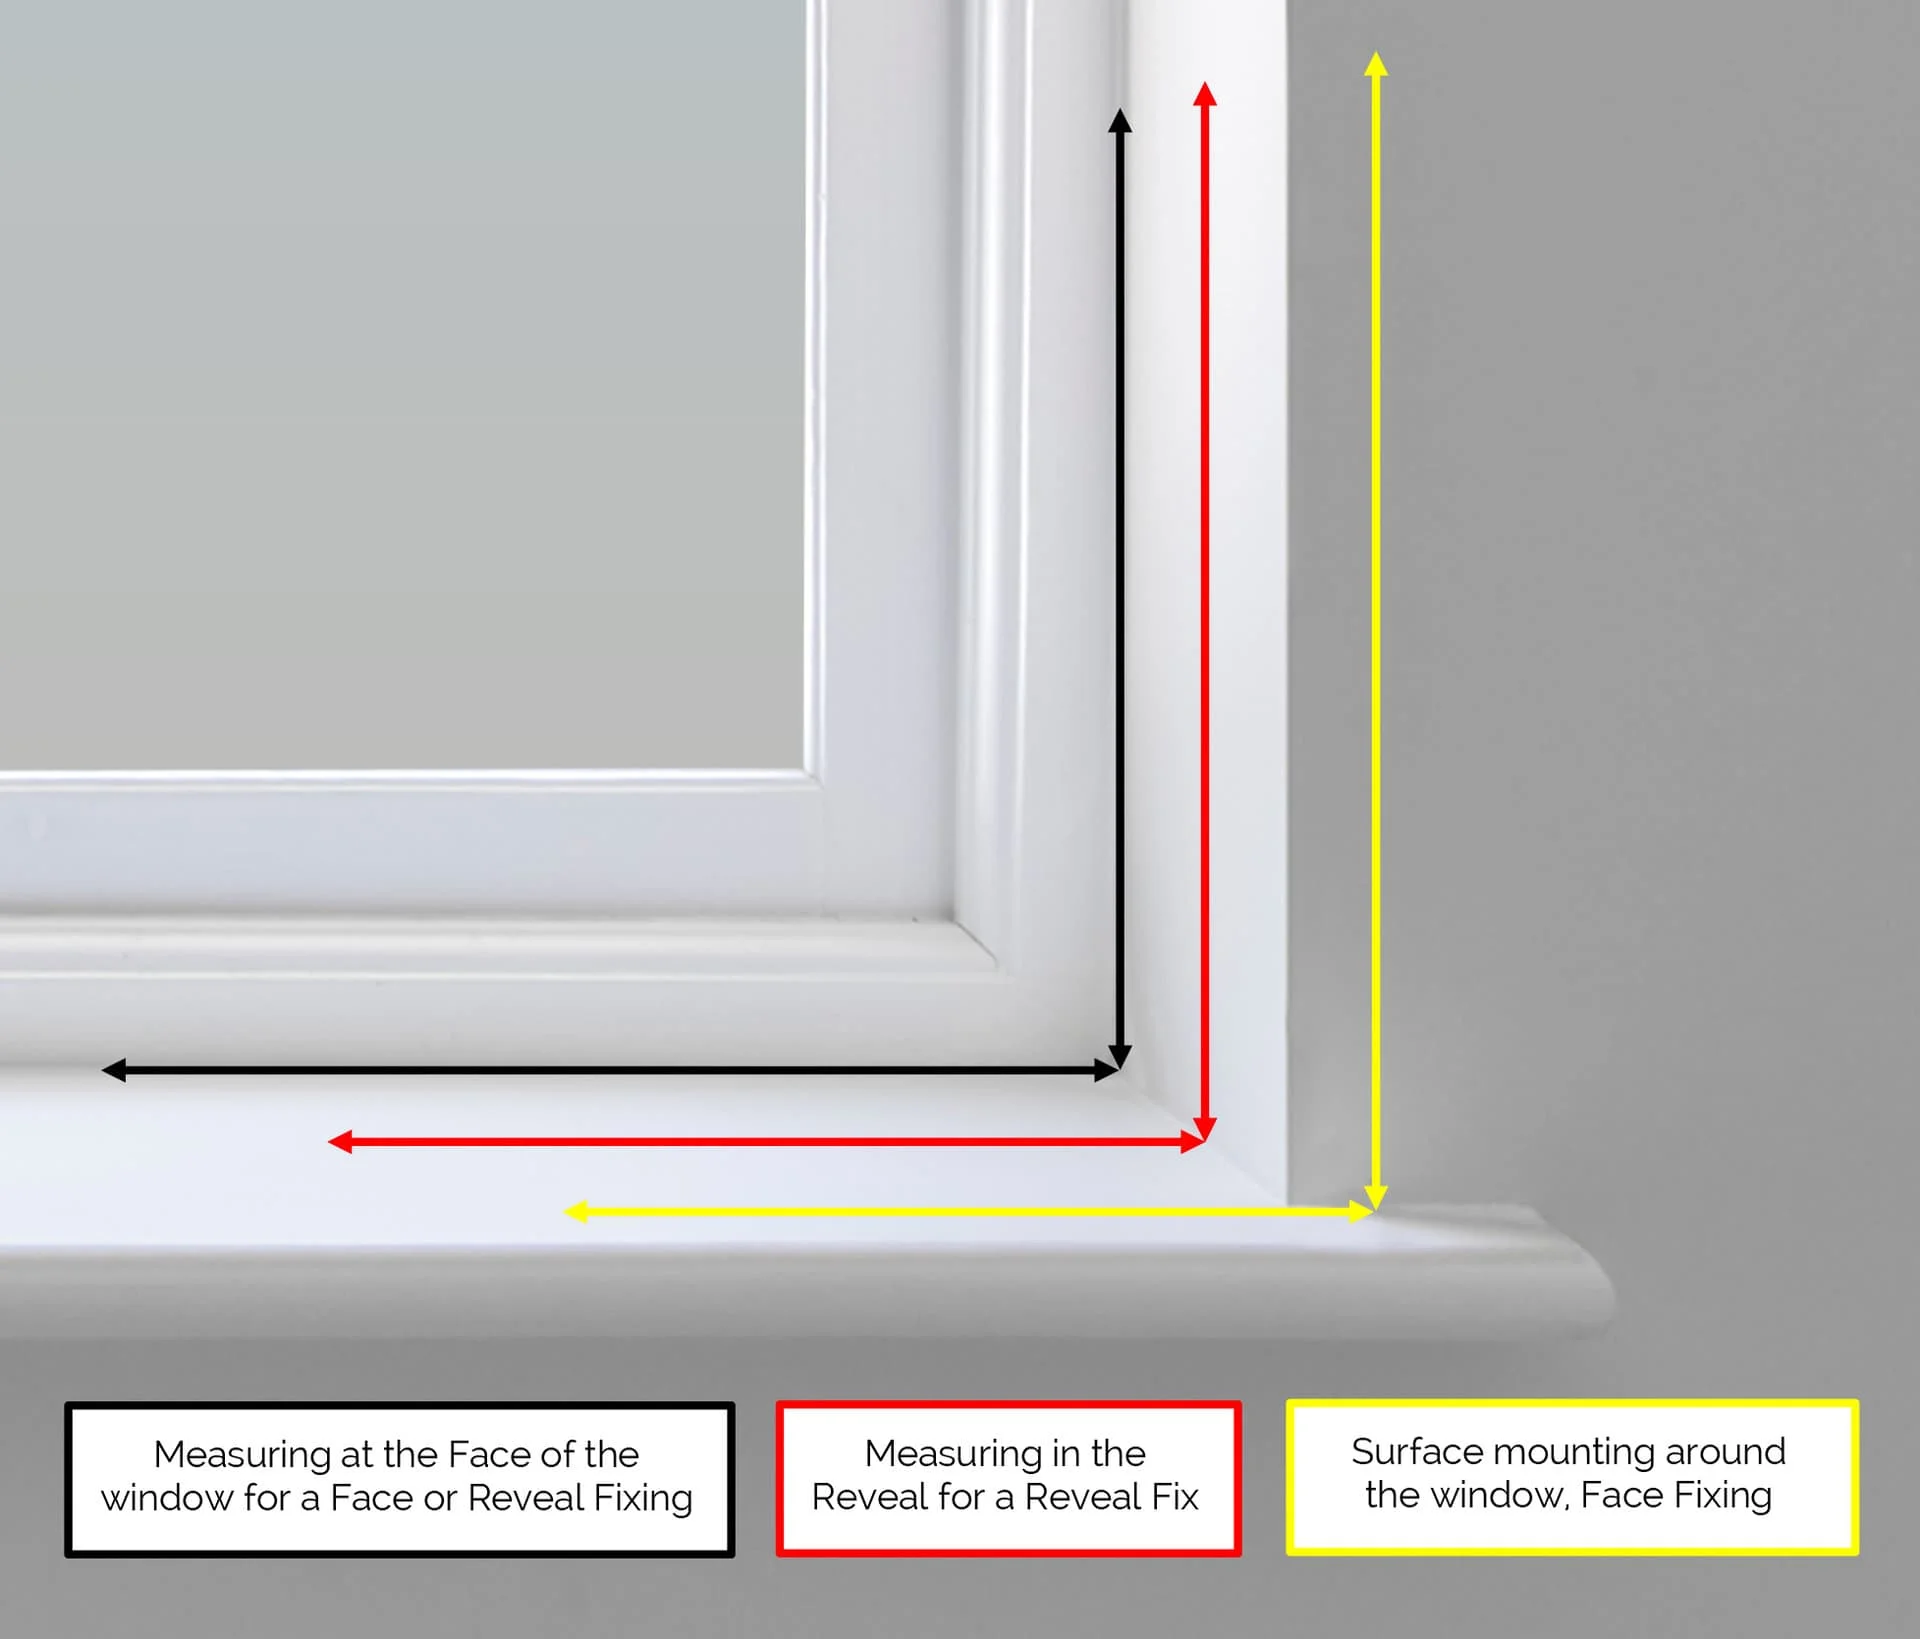
Face & Reveal Fixing is simply the direction the screw holes are placed, face fix: front to back, Reveal Fix through the sides.
- Face Fixing: this is the default set option – Front to back fixing, the unit is fitted in the reveal screw fixed directly onto the face of the primary window frame – tolerance deductions are recommended to ensure the unit will comfortably fit into the reveal / aperture.
- Surface Mounting: this is the same as face fixing – but the unit will be measured and screw fixed to the internal room wall around the reveal, therefore the unit will need to be bigger than the reveal – see product brochures for frame sizes. (this is a less common option, needed if there is no reveal or there are obstacles in the reveal, opening inward windows etc)
- Reveal Fixing: this is where the unit is placed in the reveal, side fixing, into the left right, top & sill of the reveal. This is applied to increase the distance from the primary window to the back of the unit, increasing soundproofing performance or accommodating protruding handles or catches etc, or if there is insufficient frame available to face fix into. Measurements should be taken where the unit will be placed in the reveal and the same tolerance deduction process applied to ensure fit. You can select a self drill option through the track as the most cost effective or select an XL (Extra Long) sub-frame and this will be pre-drilled for you. The options can be applied in the modify area of the FastQuote.
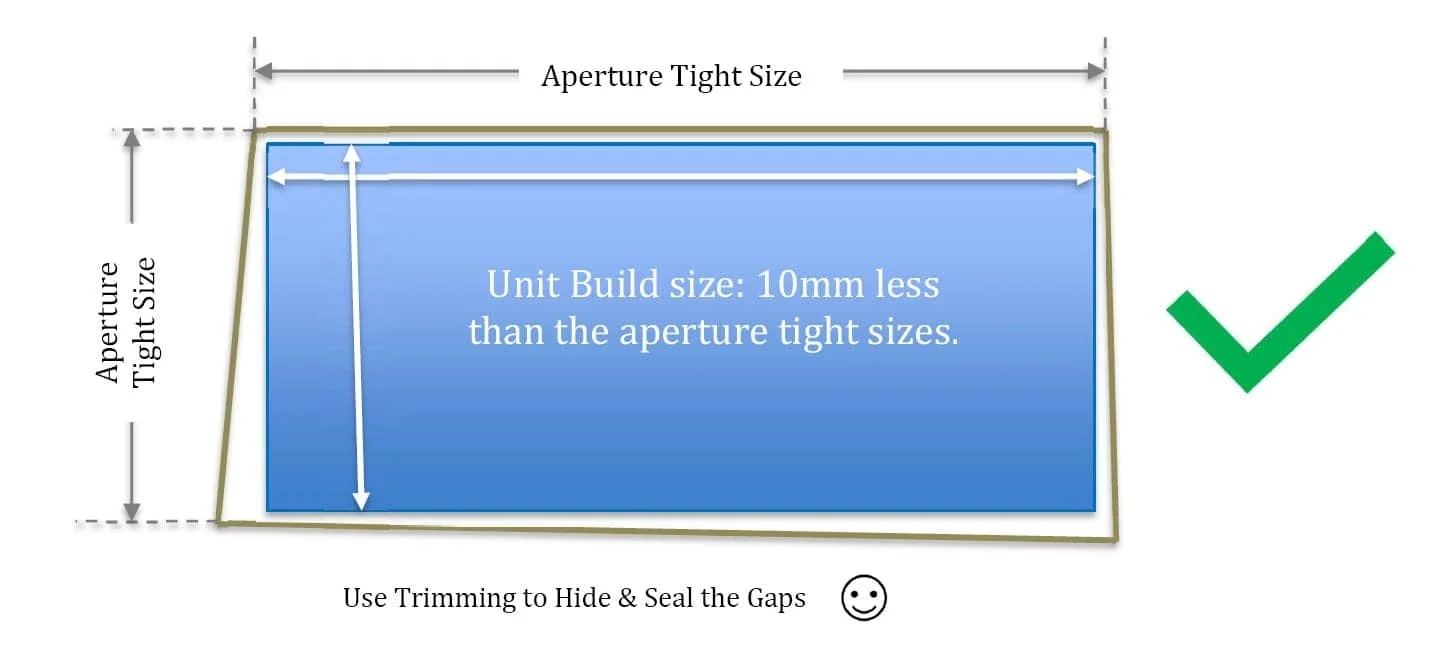
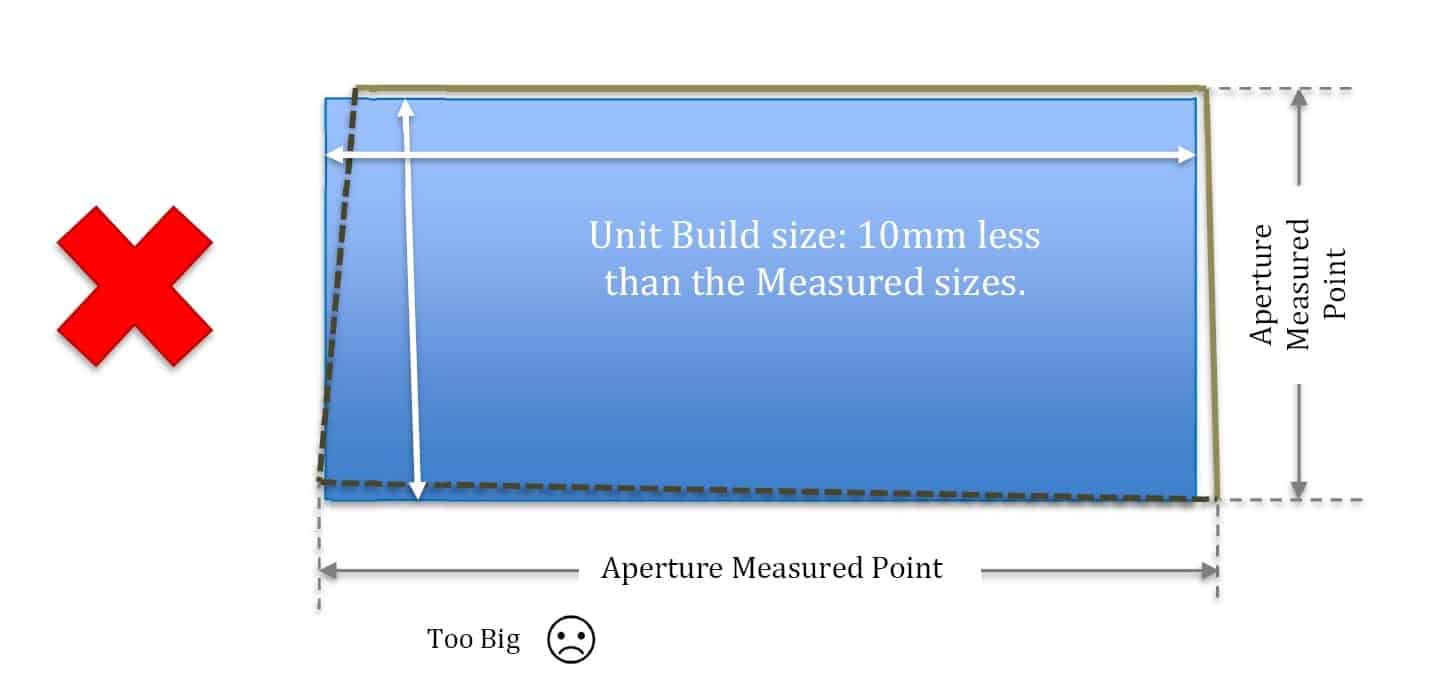
All details are all based from a position of inside, looking out of the window. When measuring your window it is important to apply Tolerance Deductions to the sizes taken, this simplifies the installation and improves the final appearance. The tolerance deductions accommodate out-of-square/distortions in the primary window frame (it may be necessary to adapt this tolerance if the window frame is extremely distorted). DO NOT WORRY ABOUT THE GAP between frame and wall, this is fully sealed by the trimming process and will not notably affect performance, you can choose to fill the gap prior to trimming with a flexible filler or expanding foam, if reveal fixing back-trimming. Taking a lesser deduction is OK if you are confident about measuring and your primary window construction. However, additional work and adjustments to the secondary frame may be required, and remember there is a manufacturing drift of +/- 3mm from the confirmed unit build sizes. It’s better to take width and height measurements at several points, checking for variances. The smallest / narrowest measurements should be used. It’s better to have the unit made slightly too small, than too large, gaps are easier to hide and covered by edging trim, and a few mm of inaccuracy will not be noticed and will not affect performance. If the unit is wedged in too tightly, it can distort the frame, reducing efficiency and operation. Also, a gap around the unit allows for seasonal expansion and contraction, in addition, due to the wide variation in window design and property age some onsite adjustments may be unavoidable.
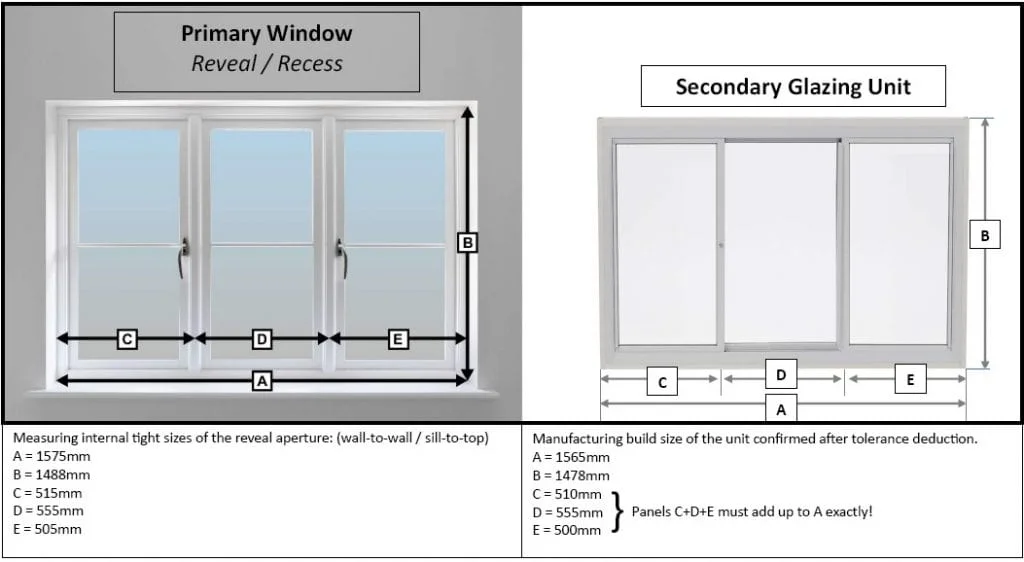
Tolerance: reducing the total measured width and height by 10mm (giving 5mm clearance per side) and reduce the first and last panels by 5mm. E.g. measuring a window 1195mm wide x 1245mm high would require a manufacture of 1185mm x 1235mm, the measured panels must add up to the build size width or height whichever appropriate, (10mm off the total, 5mm of the first and last panel). Measuring details (internally facing the window) should be submitted by width x height x pane separation sizes. Centre points of horizontal sliders (sliding side to side) are taken from the left side to centre of mullion. Sash/vertical sliding windows (Sliding up/ down) the mid-rail measurement is always taken from the top to centre of mid rail. NB If the window panes are not equal in size (offset) still follow these instructions. Take your time, the measurements are important – we use them as our manufacturing instructions.
Take your measurements for secondary glazing when the primary window is in a finished state. Any painting, plastering, dry-lining, bulk heads or boxing out need to be complete before measuring, make any required adjustments to accommodate any protruding items, e.g. handles, either by unit position or using an XL sub-frame. Need more help? Email with information about the primary window.
Please Remember!
Measure left to right
All width measurements should be taken left to right.
Measure from inside looking out
Always measure from inside the room, facing the window.
TOLERANCE: better too small than too big
The widest part of the secondary glazing frame must fit inside the narrowest point of the area it is being fitted. There is a manufacturing drift of +/-3mm from the make sizes confirmed. Gaps are hidden by the trim for a clean neat finish. If surface mounting around an aperture, add the frame size to the internal aperture width and height.
Do not worry about the tolerance gap
The tolerance-adjusted gap will be fully covered and sealed by the perimeter trimming process and does not affect performance.
Measure split heights from the top down
When measuring a split in the height of a unit, always measure from the top down.
Horizontal sliders slide left-right, vertical sliders slide up-down
Apply the correct panel-split measuring method for each slider type.
ALWAYS give your measurements in mm!
All measurements must be submitted in millimetres, not centimetres or inches.
Bay Windows
See Build-a-Bay Guide [click here]
If treating an Angled or Square Bay the measuring format is exactly the same, just the corners being either 90 degrees or greater than e.g. 135 degrees. If the bay can be constructed using 3 units (Sides and Front), just measure the 3 sections and in the FastQuote enter 3 units with the 2 angles as required – see templates above. If you want to construct the bay using 4 or more units, treat each unit individually, and when adding the angles, just connect the side to its adjacent front unit:
a. Bay Left Side b. Bay Left Front c. Bay Right Front d. Bay Right Side
Connect a+b with angle required – 2 unit bay. Connect c+b with angle required – 2 unit bay. The total structure will then form the bay required.
For a Curved multipart Bay each section should be treated as an individual single unit.
Coupling Units Together
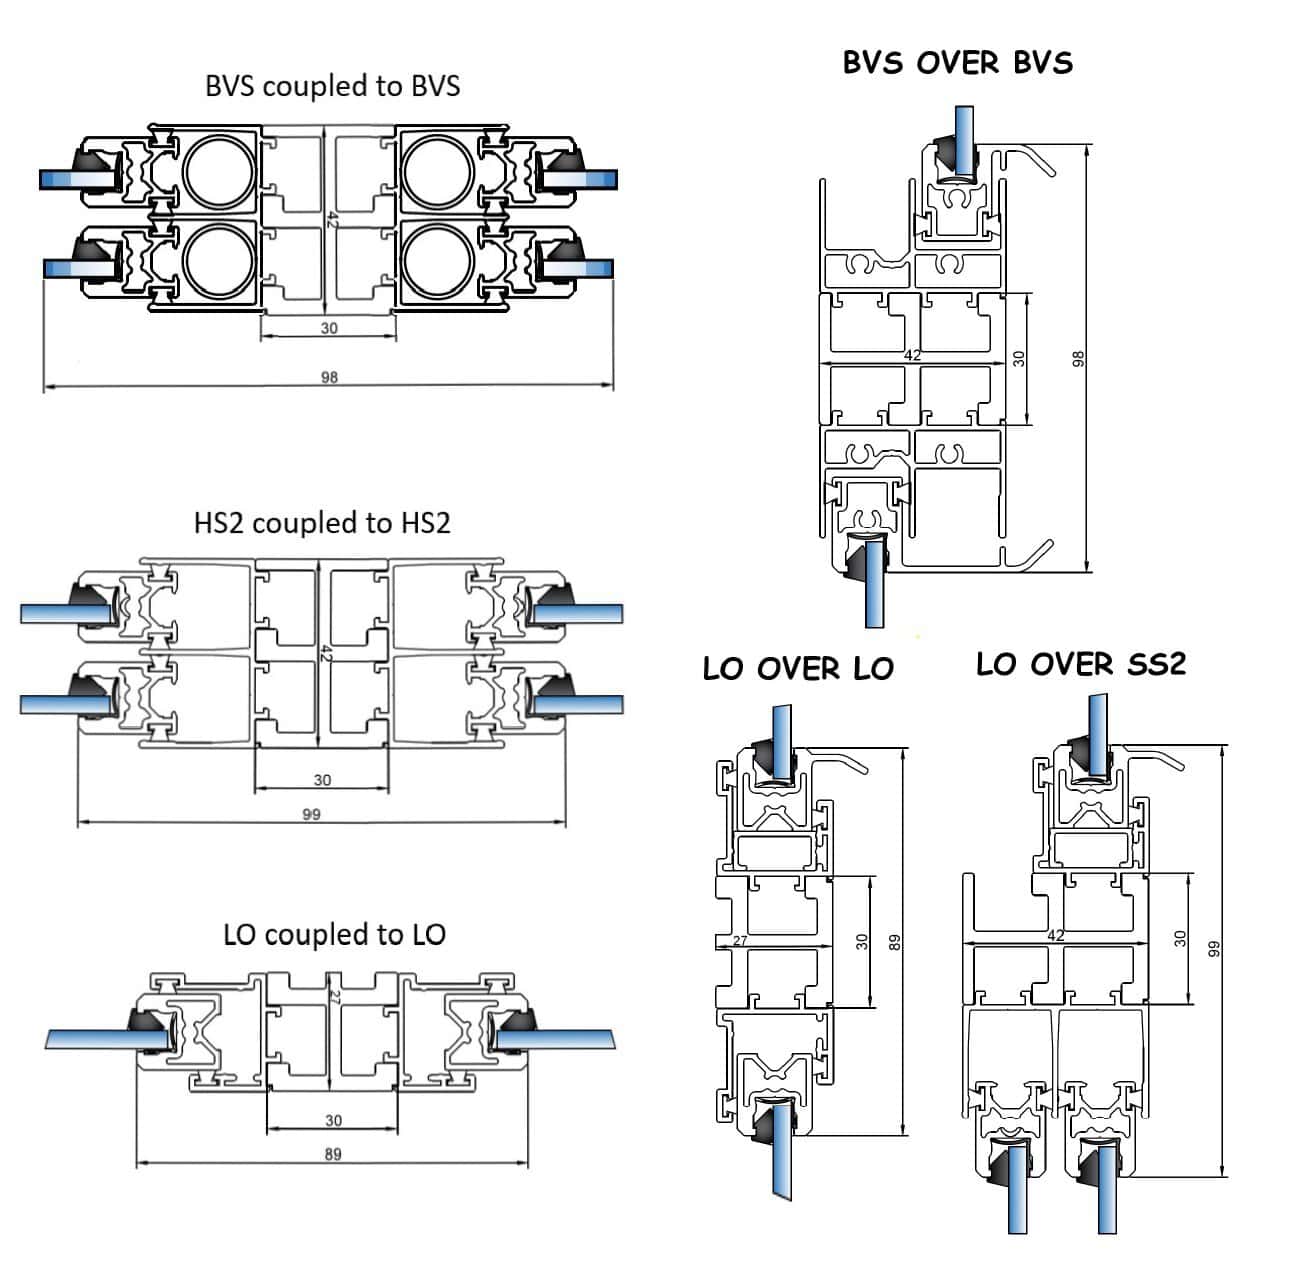
If your windows are too large for a single sized unit, you can couple units together either side-by-side or stacked one-on-the-other. This can be done timber-to-timber or using a coupling bar, which replaces the sub-frame where the units connect. These can be added in the modify area of the FastQuote – “Add Extras.”
If you are stacking horizontal sliders which are wider than 1200mm, you will need to apply 70 x 16mm XL sub-frames and box support bars for each interlocking panel section, to support the weight and prevent sagging.
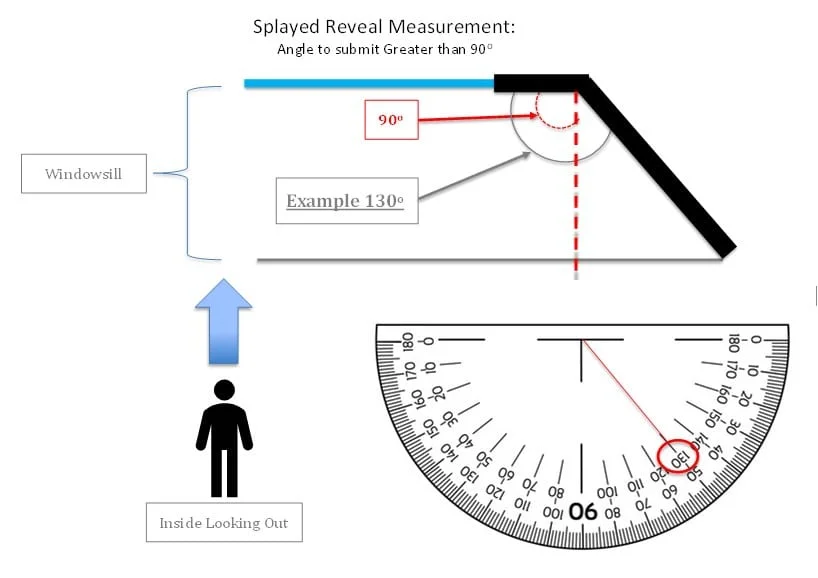
Splayed Reveals – Angled Sides
Where the sill widens towards the room when looking out. See the Measuring Guide for more details.
Still unsure?
Arrange a call-back